Leave Your Message
0%

Ever had a Reverse Osmosis Tank that just won’t fill? Yeah, that turns a simple water task into one of those annoying little mysteries. The faucet barely dribbles, and when you lift the tank, it feels way too light. It’s a pretty common issue, but figuring out why it’s happening? Not always so obvious. Low feed pressure, clogged filters, a closed valve, or the tank pressure being off can all cut production.

Start with what you can actually see. Is the feed-water valve all the way open? Check the filter stages too—if they’re badly discolored or way past due, that’s a clue. Then listen near the drain line. If wastewater keeps running, the automatic shutoff valve might be faulty. If there’s no drain flow at all, you could be dealing with a blocked flow restrictor. If you’ve got a pressure gauge, great—use it. It beats guessing. Most household systems need enough incoming pressure, but the right range depends on the manufacturer’s design.

The tank itself deserves a close look too. Before checking its air pressure, shut off the water supply, and follow the system manual carefully. An empty tank usually needs a specific pressure range, measured with no water inside. Too much air can lower storage capacity. Too little can keep it from delivering properly.

And honestly? Small clues matter.

Real-world troubleshooting is hardly ever a neat straight line. I’ve seen a freshly replaced filter cause trouble because the protective wrapping was still on it. I’ve also seen valves that look open but still restrict flow. If the problem sticks around, a qualified water-treatment pro can safely test pressure, tubing, and internal components. A solid diagnosis protects water quality and saves you from replacing parts you didn’t need to replace.
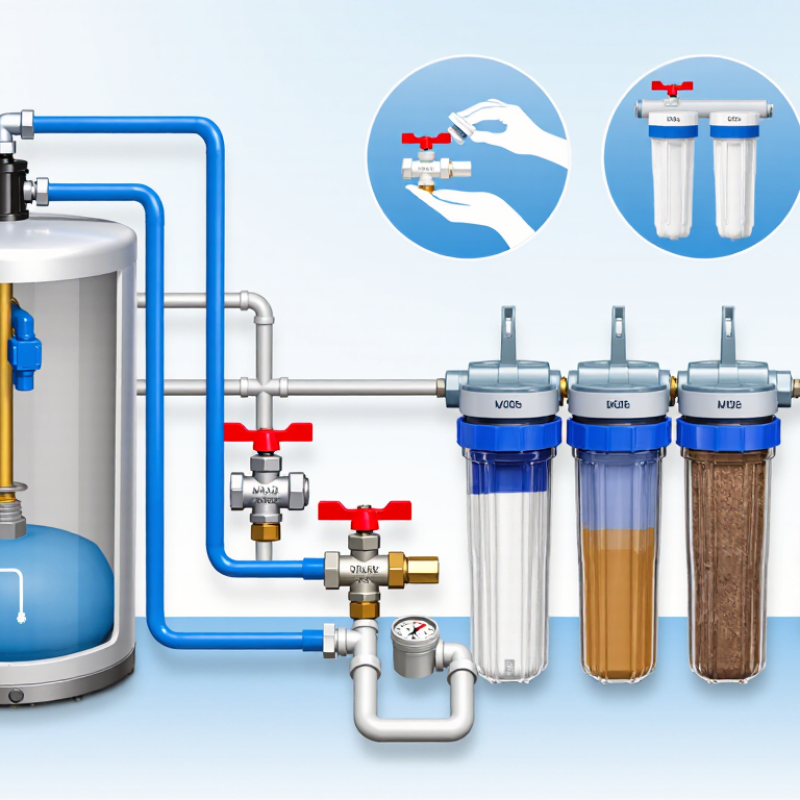
Why Is My Reverse Osmosis Tank Not Filling?

Common Reasons a Reverse Osmosis Tank Stops Filling

Why Is My Reverse Osmosis Tank Not Filling?

Common Reasons a Reverse Osmosis Tank Stops Filling

A reverse osmosis tank may stop filling because water cannot enter the system. Check the feed valve under the sink. It should be fully open, not slightly turned. Low household water pressure can also slow production or stop it completely. Many systems need steady pressure to push water through the membrane. A clogged sediment or carbon filter is another frequent cause. Remove the filter housing carefully, and inspect for dark buildup or restricted flow.

The shutoff valve may also be closing too early. This can happen when internal pressure is uneven or a valve becomes worn. Check the drain line for kinks, especially behind the cabinet. A blocked flow restrictor or drain connection can disrupt normal operation. The membrane itself may be fouled after long use. I once blamed the tank, but the real problem was a heavily clogged prefilter.

Check Reverse Osmosis Tank Pressure with the tank empty. Turn off the water supply, open the drinking-water faucet, and let the pressure escape. Then test the air valve with a pressure gauge. Many tanks require about 5–8 psi, but the correct setting depends on the system design. Too much air leaves little room for water. Too little air can make delivery weak. Do not add air while the tank is full. If the tank remains empty after these checks, a technician should test the shutoff valve, membrane, and pressure readings. Sometimes, the first diagnosis is wrong.

How to Check the Water Supply and Shutoff Valve

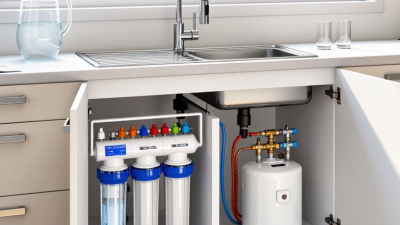
A reverse osmosis tank may stop filling when its water supply is restricted. Check the cold-water feed valve under the sink. Turn it fully counterclockwise, then inspect the tubing for sharp bends or crushed sections. A partly closed valve can reduce pressure enough to stop production.

Close the tank valve and open the filtered-water faucet. Water should flow briefly, then slow to a drip. If no water appears, check the feed line and the automatic shutoff valve. Sediment around the valve may prevent proper movement. A clogged Water Tank Filter can also limit flow. Replace filters according to measured pressure and water quality, not only the calendar. EPA WaterSense research reports that household leaks waste nearly 10,000 gallons yearly on average. A small connection leak deserves attention.

Tips: Listen near the shutoff valve. A faint hiss may indicate a leak or restricted passage. Confirm the storage tank’s air pressure only when it is empty. Follow the system manual, because incorrect pressure can damage the bladder. The Water Quality Association recommends using components tested to NSF/ANSI 58 for residential reverse osmosis safety and performance. I have seen tanks blamed too quickly; the real fault was often a half-closed supply valve. Still, pressure readings can mislead when filters are overdue. Record the pressure, valve position, and faucet flow before replacing parts.

How to Inspect the Filters, Membrane, and Flow Restrictor

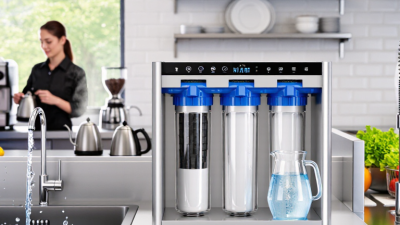
When an RO tank stays light and empty, inspect the filters, membrane, and flow restrictor before replacing parts. Start with the sediment and carbon cartridges. Cloudy sediment, a collapsed cartridge, or incorrect seating can reduce feed pressure. Close the inlet valve, relieve pressure, and check each cartridge carefully. Do not judge a filter by appearance alone. Low pressure after filtration often indicates a clogged prefilter. The WHO Guidelines for Drinking-water Quality emphasize regular maintenance and performance monitoring for treatment systems.

The membrane needs adequate pressure and a clear drain path. Measure pressure at the membrane inlet with a suitable gauge. Many residential systems operate near 50–100 psi, depending on design. Cold water can slow production noticeably. Check the drain tube next. A blocked flow restrictor can stop brine discharge and leave the membrane unable to produce water. A missing or oversized restrictor can send excessive water down the drain. The U.S. EPA WaterSense Reverse Osmosis Systems Specification uses 2.3 gallons of reject water or less per gallon treated as an efficiency benchmark. This provides a practical comparison for a Water Tank Purifier setup.

Test the restrictor by collecting drain water for one minute. Compare the result with the system’s rated flow. Also inspect the automatic shutoff valve and tubing for kinks. An empty tank may have a failed air charge, not a failed membrane. Check tank pressure only when the tank is fully empty. I sometimes find the diagnosis is less obvious than expected. Replace one part at a time, or the real fault may remain hidden.

Why Is My Reverse Osmosis Tank Not Filling?

How to inspect the filters, membrane, and flow restrictor

A typical residential reverse osmosis system needs approximately 40–80 psi of feed-water pressure. With the tank completely empty, the air precharge is commonly checked at about 5–7 psi. If pressure is adequate, replace clogged sediment or carbon filters, inspect the membrane for fouling, and confirm that the flow restrictor matches the membrane's rated flow. The exact values can vary by system design.

Testing the Air Pressure Inside the RO Storage Tank

Why Is My Reverse Osmosis Tank Not Filling?

A reverse osmosis tank may stop filling when its internal air pressure is incorrect. Testing that pressure requires an empty tank, not a pressurized one. Turn off the water supply and open the drinking faucet. Let the tank drain completely. A full tank can give a false reading.

Remove the small cap from the air valve on the tank bottom. Attach a low-pressure tire gauge gently. Most residential tanks need about 5–8 psi when empty, but check the system instructions first. If the reading is too high, release air in short bursts. If it is too low, add air with a hand pump. Do not use a high-pressure compressor. The tank should feel light and nearly empty during testing. Mine sometimes feels “empty” before it truly is, so I leave the faucet open longer than expected.

Tips: Check the pressure again after several minutes. A falling reading may indicate a damaged bladder. Also inspect the Water Tank Filter System for clogged filters, a restricted tube, or a closed valve. Low pressure can slow filling. Excessive pressure can prevent water from entering. If water comes from the air valve, stop testing. The internal bladder may have failed, and the tank needs professional replacement. Recheck every few months, especially when the faucet flow becomes weak.

Diagnosing Faulty Automatic Shutoff and Check Valves

Why Is My Reverse Osmosis Tank Not Filling?

A reverse osmosis tank that stays light usually has a valve problem, not a membrane problem. The automatic shutoff valve should stop waste flow when tank pressure approaches incoming water pressure. If it sticks open, water may continue draining while the tank barely fills. A blocked inlet screen can create similar symptoms.

The check valve is equally important. It sits near the membrane outlet and prevents pressurized tank water from flowing backward. If it leaks, the system may repeatedly cycle, produce a slow trickle, or show constant drain flow. The U.S. EPA WaterSense specification uses a 2.3:1 waste-to-treated-water ratio as a performance benchmark for point-of-use reverse osmosis systems. Excessive waste flow can suggest a failed shutoff valve, poor pressure, or a damaged flow restrictor. NSF/ANSI 58 also evaluates reverse osmosis system performance, including structural integrity and contaminant reduction.

Tips: Close the feed valve and open the faucet briefly. Check whether the drain stops after several minutes. Then inspect the tank pressure with an empty tank; many residential systems need roughly 5–8 psi, though manufacturer instructions vary. Do not adjust blindly. I have found that replacing the check valve first is sometimes wrong; a misread pressure gauge caused the real problem. Feel the drain line carefully, because warm continuous flow often confirms the shutoff valve is not closing. Recheck connections after testing. Small leaks can hide beneath the housing.

Step-by-Step Solutions to Restore Proper Tank Filling

Why Is My Reverse Osmosis Tank Not Filling?

A reverse osmosis tank may stay empty when water cannot reach it or pressure cannot push water inside. Start by closing the drinking-water faucet and checking the tank valve. It should be fully open. Confirm that the main feed valve is open, then inspect the tubing for sharp bends, crushed sections, or loose connections. Small leaks can reduce pressure quickly.

Check the filters next. A clogged prefilter often slows production and leaves the tank nearly dry. Turn off the water supply before removing any housing. Release pressure carefully, then inspect the filter condition and sealing rings. If the membrane has been installed recently, verify its direction and seating. A backwards or poorly fitted membrane can stop normal flow.

The tank itself may need an air-pressure check. Drain all water from it, then measure pressure at the air valve with a low-pressure gauge. Follow the system’s specified range; too much air can block filling, while too little may prevent delivery. Also inspect the drain-flow control and shutoff valve. A continuously running drain can signal a faulty valve or incorrect flow control.

Allow several hours after repairs. RO systems fill slowly. If the tank remains empty, test the incoming water pressure and check for a blocked automatic shutoff valve. I have found that replacing parts too early wastes time. A pressure reading usually reveals more than guesswork. Contact a qualified water-treatment technician when leaks, damaged fittings, or unclear pressure readings remain.

Why Is My Reverse Osmosis Tank Not Filling? - Step-by-Step Solutions to Restore Proper Tank Filling

Step Likely Cause What to Check Recommended Action Normal Result Typical Time
1 The storage tank valve is closed Look at the small valve on top of the tank. The handle is usually parallel to the tubing when open. Turn the valve slowly to the open position. Do not force a stiff or damaged valve. Water can enter the tank and the system begins producing treated water. 1–2 minutes
2 Insufficient incoming water pressure Check whether other fixtures have weak flow and confirm that the feed-water shutoff valve is fully open. Restore the household water supply. If pressure remains low, measure it with a pressure gauge and consult a qualified plumber. Many residential RO systems require approximately 40–80 psi (2.8–5.5 bar), depending on the system design. Immediate after correction
3 Kinked, blocked, or disconnected tubing Inspect the feed, product-water, drain, and tank lines for sharp bends, crushed sections, loose connections, or leaks. Straighten tubing and reconnect push-fit fittings securely. Replace tubing that is cracked, flattened, or damaged. Water flows through the system without visible leakage or restricted sections. 5–15 minutes
4 Clogged prefilters Check filter age, sediment buildup, discoloration, and reduced flow. Sediment and carbon filters commonly require periodic replacement. Shut off the water, depressurize the system, and replace filters according to the system instructions. Improved feed flow reaches the membrane housing. 15–30 minutes
5 Exhausted or fouled RO membrane If filters are acceptable but production remains very slow, check the membrane replacement date and compare product-water flow with the system specification. Replace the membrane using the correct type and installation procedure. Sanitize the housing when required. The system produces water at a rate closer to its rated capacity under the same pressure and temperature conditions. 30–60 minutes
6 Incorrect tank air pressure Turn off the feed water, open the RO faucet, and drain the tank completely. Measure air pressure at the tank valve with a low-pressure gauge. Adjust pressure only when the tank is empty, following the tank or system specification. A common residential setting is about 5–7 psi (0.35–0.48 bar), but specifications vary. The empty tank accepts water, and treated water dispenses with steady flow after refilling. 10–20 minutes
7 Waterlogged or damaged storage tank bladder With the tank empty, check whether air pressure cannot be maintained or water exits from the air valve. Replace the tank if water comes from the air valve, the bladder is ruptured, or the tank cannot hold the specified air pressure. The replacement tank holds air pressure and fills normally. 30–60 minutes
8 Automatic shutoff valve or check valve malfunction If water continuously flows to the drain or the system never stops producing water, inspect the shutoff and check valves for incorrect flow, debris, or failure. Confirm tubing orientation and replace faulty valves with compatible components. Do not bypass safety or shutoff devices. Drain flow stops when the tank reaches operating pressure. 15–45 minutes
9 Drain-line restriction or incorrectly installed flow control Check for a kinked drain tube, blocked drain connection, or missing or incorrectly positioned flow restrictor. Restore the drain connection and flow-control component according to the system diagram. Keep the drain line secure and unobstructed. The membrane receives appropriate back pressure and the system fills without excessive drain flow. 10–30 minutes
10 Normal slow production or low water temperature Consider water temperature, feed pressure, membrane rating, and daily water use. RO production is slower with colder water and lower pressure. Allow sufficient refill time and avoid repeated faucet use while the tank is recovering. Compare performance with the manufacturer’s stated conditions. The tank gradually fills, although the actual time may vary significantly with system capacity and household conditions. Several hours or longer
11 Tank valve or plumbing leak Dry the fittings, run the system briefly, and look for fresh moisture around the tank valve, housings, and connections. Shut off the water before tightening or replacing fittings. Replace damaged seals or components rather than overtightening plastic parts. Connections remain dry while the tank builds pressure. 10–30 minutes
12 System still does not fill after basic checks Review pressure, flow direction, filter and membrane condition, valve operation, tank air pressure, and drain routing. Stop using the system if there is a leak, damaged pressure vessel, or unsafe plumbing condition. Contact a qualified water-treatment technician. The fault is diagnosed without risking water damage or improper component replacement. Depends on diagnosis

Safety note: Turn off the feed-water supply before servicing the system. Replace filters and pressure components only with compatible parts, and follow the equipment’s installation and maintenance instructions.

China Factory 4040 & 8040 RO Membranes: Insights from Global Water Intelligence and MarketsandMarkets Reports

China-made 4040 and 8040 reverse osmosis membranes are gaining attention as water treatment demand expands across municipal, industrial, and commercial applications. Market research from leading water intelligence and industry analysis organizations highlights the growing need for efficient desalination, wastewater reuse, and lower-energy purification systems. Standard 4040 and 8040 dimensions make these membranes compatible with widely used pressure vessels, helping operators simplify equipment selection, replacement, and system maintenance.

A China-based factory can provide several membrane options for different feedwater conditions. BW membranes are designed for brackish water treatment, while LP and ULP membranes support low-salinity applications under reduced operating pressure, helping lower energy consumption. FR membranes feature enhanced resistance to fouling and are suitable for wastewater recycling and reuse. With strong salt rejection, dependable permeate flow, and stable long-term performance, these membranes serve water treatment plants, electronics manufacturing, pharmaceutical production, food processing, petrochemical facilities, and industrial wastewater systems. Flexible production capacity, consistent quality control, and standard sizing also allow suppliers to support both new installations and membrane replacement projects.

FAQS

Why is my reverse osmosis tank not filling?

A restricted water supply may stop filling. Start with the valve. Turn the cold-water feed valve fully counterclockwise. Check the tubing for sharp bends or crushed sections. A partly closed valve can reduce pressure significantly.

How can I check the tank and faucet flow?

Close the tank valve and open the filtered-water faucet. Water should flow briefly, then slow to a drip. If nothing appears, inspect the feed line and automatic shutoff valve. Sediment may block valve movement.

Can a clogged filter prevent the tank from filling?

Yes. A clogged prefilter can slow production and leave the tank nearly empty. Turn off the water before removing filter housings. Release pressure carefully. Replace filters according to water quality and pressure, not just the calendar.

How do I test the tank’s air pressure?

Drain the tank completely before testing. Open the drinking faucet and wait longer than expected. Remove the cap from the bottom air valve. Use a low-pressure tire gauge gently. Many household tanks require about 5–8 psi when empty, but follow the system instructions.

What does incorrect air pressure do?

Excessive pressure can prevent water from entering the tank. Too little pressure may weaken faucet delivery. Add air with a hand pump only. Release air in short bursts. Do not use a high-pressure compressor.

How can I tell whether the tank bladder has failed?

Check the air pressure again after several minutes. A falling reading may indicate bladder damage. If water comes from the air valve, stop testing. The tank likely needs professional replacement.

What tubing and valve problems should I inspect?

Look for loose connections, crushed tubing, sharp bends, and small leaks. Listen near the shutoff valve. A faint hiss may reveal restricted flow or leakage. I have sometimes blamed the tank too quickly.

What should I do if the tank remains empty after repairs?

Allow several hours because filling is slow. Check incoming water pressure and the drain-flow control. Continuous drainage may indicate a faulty valve or incorrect flow control. Record pressure, valve position, and faucet flow before replacing parts. Guesswork wastes time.

Conclusion

When a Reverse Osmosis Tank is not filling, the problem may come from a restricted water supply, a partially closed shutoff valve, clogged prefilters, a blocked membrane, or an incorrectly sized flow restrictor. Begin by confirming that the incoming water pressure is adequate and that every valve is fully open. Then inspect the filters and membrane for blockage or overdue replacement, and check the flow restrictor for debris or improper installation. These components must work together to allow purified water to enter the storage tank at the correct rate.

Tank air pressure is another important factor. With the tank empty, use a pressure gauge to test the air charge and adjust it according to the system’s requirements. If the automatic shutoff valve or check valve is stuck, damaged, or leaking, water may stop entering or continuously drain away. Replacing faulty parts, correcting tubing connections, restoring proper pressure, and flushing new filters can help return the system to normal operation. Regular maintenance and timely filter changes can also prevent future filling problems.
Sophia

Sophia

Sophia is a dedicated marketing professional with extensive expertise in the filtration industry. With a keen understanding of the core products offered by her company, she excels in communicating the value of high-flow filter cartridges, reverse osmosis membranes, micro-pleated filter cartridges,......
Previous How to Choose a Reverse Osmosis System in 2026?